
Tutorials
About Creality Ender 3 v3
Sep
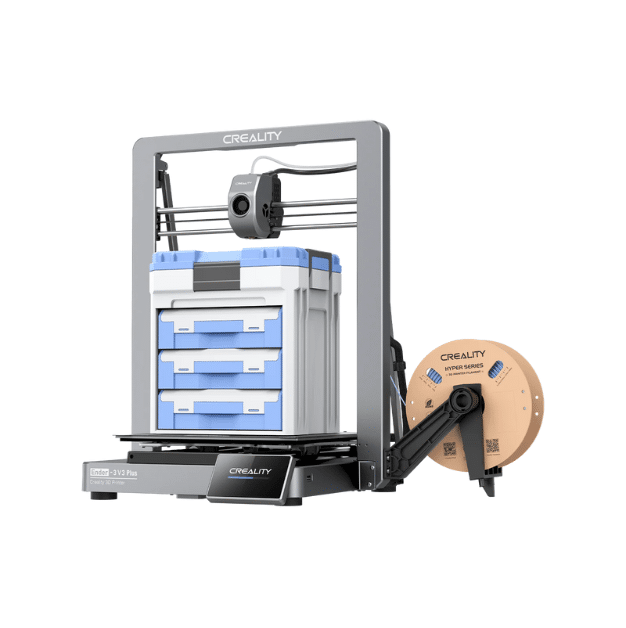
Creality Ender 3 V3: A Comprehensive Guide to Your New 3D Printer
The Creality Ender 3 V3 has generated significant buzz in the 3D printing community, marking a notable evolution in the popular Ender 3 series. This guide will walk you through every essential aspect of this printer, from its core features and technical specifications to assembly, software, and troubleshooting, providing a complete overview for both beginners and experienced makers.
At a Glance: Key Features of the Ender 3 V3
The Ender 3 V3 distinguishes itself from its predecessors with a host of modern features designed for speed, precision, and ease of use.
- CoreXZ Motion System: This innovative system is a significant departure from the traditional Cartesian design. By coordinating the X and Z axes with two high-torque motors, the printer can achieve remarkable printing speeds and accelerations without sacrificing quality.
- High-Speed Printing: The Ender 3 V3 boasts a maximum print speed of 600mm/s and a maximum acceleration of 20000mm/s², making it one of the fastest printers in its class.
- Direct Drive Extruder: Equipped with a new and improved direct drive extruder, the Ender 3 V3 ensures reliable filament feeding and is well-suited for a variety of materials, including flexible filaments.
- “Unicorn” Tri-Metal Nozzle: This integrated nozzle with a hardened steel tip is designed for high-flow printing and can handle a wide range of standard and abrasive filaments. It’s also designed for easy, one-handed swapping.
- Automatic Bed Leveling: The inclusion of a CR Touch sensor enables automatic bed leveling, simplifying the setup process and ensuring a perfect first layer for every print.
- PEI Flexible Build Plate: This magnetic build plate offers excellent adhesion and makes print removal effortless. Once a print is finished and the bed has cooled, you can simply remove the plate and flex it to pop the print right off.
- 4.3-inch Color Touchscreen: The intuitive touchscreen interface provides easy access to all printer settings and functions.
- Stable and Sleek Design: The printer’s frame is constructed from die-cast aluminum alloy, providing a sturdy and stable base that minimizes vibrations during high-speed printing.
Under the Hood: Detailed Specifications
Here’s a closer look at the technical specifications of the Creality Ender 3 V3:
| Feature | Specification |
| Printing Technology | Fused Deposition Modeling (FDM) |
| Build Volume | 220 x 220 x 250 mm (8.6 x 8.6 x 9.8 inches) |
| Max. Printing Speed | 600mm/s |
| Max. Acceleration | 20000mm/s² |
| Extruder | High-speed direct drive extruder |
| Nozzle | “Unicorn” tri-metal integrated nozzle with hardened steel tip |
| Max. Nozzle Temperature | ≤ 300°C |
| Max. Heat Bed Temperature | ≤ 110°C |
| Build Surface | PEI flexible build plate |
| Leveling Mode | Hands-free auto leveling |
| Display | 4.3-inch color touchscreen |
| Mainboard | 32-bit silent mainboard |
| Connectivity | USB drive, WLAN |
| Supported Filaments | PLA, PETG, TPU, ABS, PLA-CF, PETG-CF, CR-Carbon |
| Filament Diameter | 1.75mm |
| File Formats for Slicing | STL, OBJ, 3MF, AMF |
| Slicing Software | Creality Print, Cura, Simplify3D, PrusaSlicer |
Unboxing and Assembly: What to Expect
The Ender 3 V3 arrives partially assembled, making the setup process relatively straightforward and quick. Most users report that assembly takes around 15-30 minutes.
What’s in the Box?
- The gantry frame assembly
- The printer base assembly
- Touchscreen display
- Spool holder
- A toolkit with all the necessary Allen wrenches and screws
- A small sample of PLA filament
- An SD card with the user manual and some pre-sliced models
Assembly Steps:
- Mount the Gantry: Secure the gantry frame to the base using the provided screws.
- Attach the Touchscreen: Mount the display to the front of the printer and connect the ribbon cable.
- Install the Spool Holder: Attach the filament holder to the top of the gantry.
- Connect the Cables: Plug in the remaining cables for the X and Z motors and the extruder.
Before powering on, it’s crucial to check the voltage switch on the power supply and ensure it is set correctly for your region (e.g., 115V for North America, 230V for Europe).
Your First Print: Setup and Calibration
Once assembled, the Ender 3 V3’s user-friendly features make the initial setup and calibration process simple.
The first time you power on the printer, it will guide you through an automatic calibration process. This includes:
- Auto Bed Leveling: The CR Touch sensor will probe multiple points on the build plate to create a mesh, compensating for any minor imperfections to ensure a perfect first layer.
- Input Shaping: This feature helps to reduce ringing and ghosting artifacts in your prints, especially at high speeds.
A World of Materials: Filament Compatibility
The Ender 3 V3’s high-temperature, direct-drive extruder opens up a wide range of filament possibilities. Here’s a beginner’s guide to the most common types:
- PLA (Polylactic Acid): This is the most popular and easiest filament to print with, making it ideal for beginners. It’s biodegradable, low-warp, and comes in a vast array of colors. It’s perfect for prototypes, models, and low-stress functional parts.
- PETG (Polyethylene Terephthalate Glycol): A durable and heat-resistant material that is a good step up from PLA. It offers a good balance of strength and ease of printing and is often used for functional parts.
- TPU (Thermoplastic Polyurethane): A flexible, rubber-like filament. It’s great for printing things like phone cases, vibration dampeners, and other objects that require flexibility.
- ABS (Acrylonitrile Butadiene Styrene): A strong and durable plastic known for its heat and impact resistance. It’s a more advanced material to print with as it requires higher temperatures and is prone to warping, often necessitating an enclosure.
- Carbon Fiber Filaments (PLA-CF, PETG-CF): These are composite materials that are reinforced with carbon fibers, resulting in stiffer and stronger prints.
The Brains of the Operation: Slicer Software
Before you can print a 3D model, you need to use a “slicer” software. This program takes your 3D model file (usually an STL or OBJ) and “slices” it into individual layers. It then generates a G-code file, which is a set of instructions that your 3D printer understands.
The slicer software allows you to control various print settings, such as:
- Layer Height: The thickness of each individual layer. A smaller layer height results in a more detailed but slower print.
- Infill: The internal structure of your print. You can adjust the density and pattern of the infill to control the strength and weight of your object.
- Print Speed: How fast the print head moves.
- Supports: For models with overhangs, the slicer can generate temporary support structures to prevent drooping during printing.
The Ender 3 V3 is compatible with several popular slicer applications:
- Creality Print: Creality’s own slicer software, which is a good starting point for beginners and comes with pre-configured profiles for the Ender 3 V3.
- Cura: A widely-used and highly versatile open-source slicer with a large user community.
- PrusaSlicer: Another popular open-source slicer known for its advanced features and regular updates.
- Simplify3D: A premium, paid slicer that offers a high degree of control and customization.
Common Problems and Troubleshooting
Even with its user-friendly features, you may encounter some common 3D printing issues. Here are a few and how to address them:
- Prints Not Sticking to the Bed:
- Clean the build plate: Use isopropyl alcohol to wipe down the PEI sheet to remove any dust or oils.
- Adjust the Z-offset: If the nozzle is too far from the bed on the first layer, the filament won’t adhere properly. Use the printer’s settings to slightly lower the Z-offset.
- Increase bed temperature: For some materials, a slightly warmer bed can improve adhesion.
- Nozzle Clogs:
- “Cold Pull”: This involves heating the nozzle, pushing a small amount of filament through, letting it cool slightly, and then pulling it out quickly to remove any debris.
- Use the provided needle: Carefully insert the thin needle into the nozzle tip to clear any blockages.
- Layer Shifting:
- Check belt tension: Ensure that the X and Y-axis belts are snug but not overly tight.
- Reduce print speed: Printing too fast can sometimes cause the motors to skip steps.
Community and Support
One of the strengths of the Creality ecosystem is its large and active user community. If you run into any issues or have questions, there are several places to find help:
- Creality Community Forum: Creality hosts an official forum where you can connect with other Ender 3 V3 users, ask for help, and share your prints.
- Reddit: The r/ender3 and r/Creality subreddits are popular online communities with a wealth of information and helpful members.
- Facebook Groups: There are numerous Facebook groups dedicated to Creality printers where you can find support and advice.
Ender 3 V3 vs. V3 SE vs. V3 KE: A Quick Comparison
It’s important to note that the Ender 3 V3 is part of a larger V3 series. Here’s a brief look at how it compares to its siblings:
- Ender 3 V3 SE: A more budget-friendly option with a traditional Cartesian motion system and a “Sprite” direct drive extruder. It has a slower maximum print speed than the V3.
- Ender 3 V3 KE: A step up from the SE, the KE features a more advanced extruder, a linear rail on the X-axis for improved stability, and runs on Klipper-based firmware for faster printing and more advanced features.
- Ender 3 V3: The flagship of the V3 “bed-slinger” lineup, the standard V3 incorporates the CoreXZ motion system for the fastest printing speeds and accelerations in the series.
In conclusion, the Creality Ender 3 V3 is a feature-packed 3D printer that offers an excellent combination of speed, quality, and user-friendly features at an affordable price point, making it a compelling option for both newcomers and seasoned 3D printing enthusiasts.